- What Is An Interim Invoice?
- How Does an Interim Invoice Work?
- Key Components of an Interim Invoice
- Additional Suggestions for a Professional Interim Invoice
- When Should You Use an Interim Invoice?
- Real-Life Examples of When to Use Interim Invoices
- Benefits of Interim Invoicing: Why It’s Smart for Businesses and Clients
- Step-by-Step: How to Create an Interim Invoice
- Are Interim Invoices Legally Binding?
- Why Use InvoPilot for Interim Invoicing?
- Conclusion
It can be hard to keep track of your cash flow during long-term projects, especially when you have to wait months to get paid in full. That’s when interim invoices are useful.
We’ll explain what it is, how it works, when to use it, and how to make one step by step in this guide. We’ll also show you how our tool can make things easier and help you get paid faster.
What Is An Interim Invoice?
An interim invoice is a type of billing used during long-term projects to request payment for part of the work that has already been done. Instead of waiting until the entire project is finished, businesses use it to get paid at different stages. These are also called progress invoices or progress bills. The payment schedule is usually planned in advance and may be set up to occur weekly, monthly, or quarterly, depending on the agreement between both parties.
How Does an Interim Invoice Work?
An interim invoice is a smart way for businesses to get paid in parts while a big project is still going on. Here’s how it usually works:
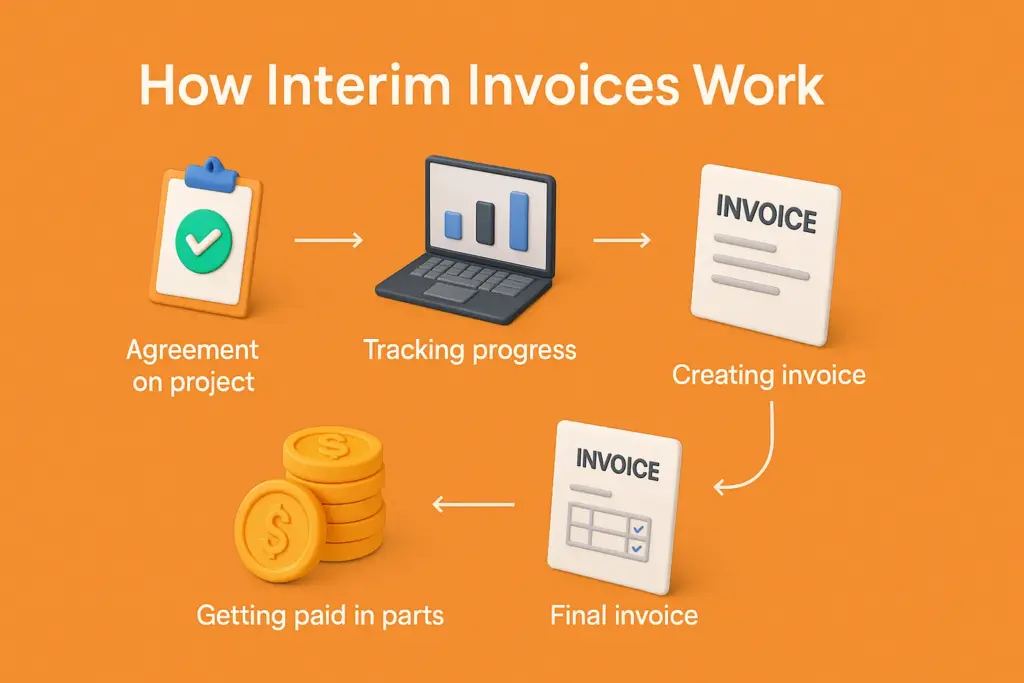
1. Agreement on the Project
First, both the client and the service provider agree on the total cost of the project. When and how often payments will be made and how many interim invoices will be sent.
2. Tracking Progress
As the project moves forward, the service provider keeps track of the work that has been completed. Based on that progress, they prepare interim invoices as agreed.
3. Creating the Invoice
Each interim invoice includes what part of the work has been done, the time period it covers, the cost for that stage and the amount the client needs to pay now.
4. Getting Paid in Parts
Instead of paying everything at once, the client pays a portion of the total cost. This amount is usually based on how much work has been finished.
5. Final Invoice at the End
Once the whole project is completed, the service provider sends a final invoice. It includes any remaining balance after all previous payments have been made.
Real-World Example: Let’s say you are a contractor engaged in a six-month home remodeling project. You and your client decide that you will get 20% of the total cost each month rather than waiting until the very end to get paid.
Depending on the amount of work completed, you send an invoice each month. It facilitates the client’s ability to make smaller payments. It ensures that your income remains consistent throughout the project. It guarantees that you are compensated for the labor you have done.
Key Components of an Interim Invoice
An interim invoice is commonly used in long-term or high-value projects where payments are split into stages. It helps in maintaining cash flow and sets clear expectations for both the service provider and the client. Here’s a complete breakdown of its key components:
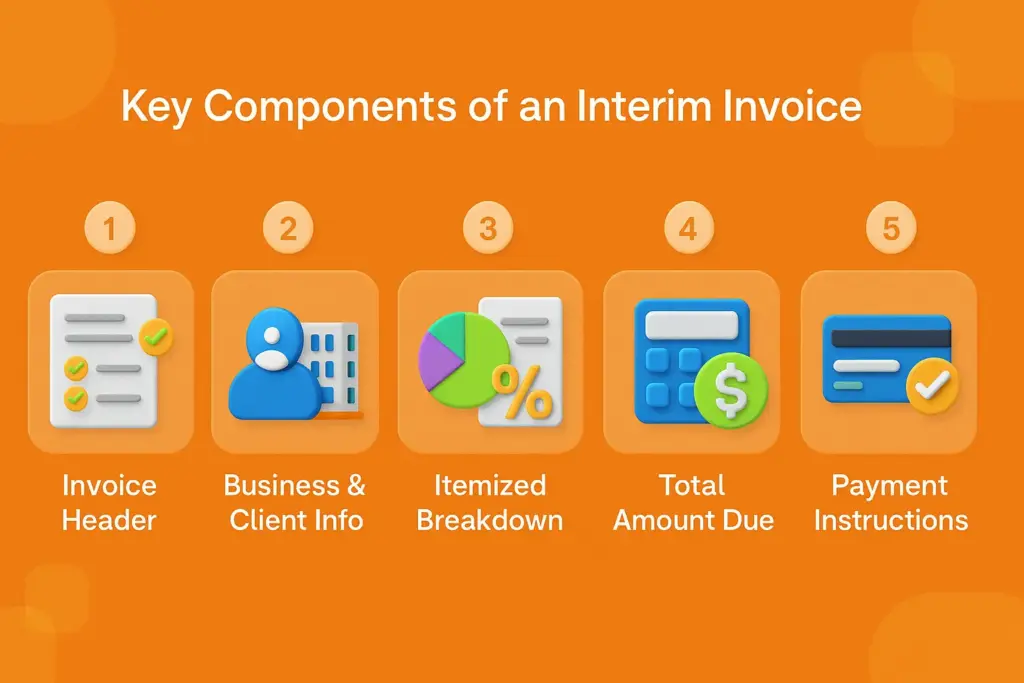
1. Invoice Header: Essential Invoice Details
The top section of an interim invoice contains key details that help in identifying and processing the invoice correctly.
- Invoice Number: A unique ID assigned to each invoice. This helps with tracking and record-keeping.
- Invoice Date: The date when the invoice is created or sent.
- Due Date: The last date by which the payment should be made. This helps avoid late payments.
- Payment Terms: Conditions agreed upon for payment, such as:
- Net 30: Payment due within 30 days.
- Due on Receipt: Payment is expected immediately.
- Project Information: Include specific details like:
- Project name
- Job site or project location
- Contract number or reference ID
Pro Tip: Always ensure that the invoice number follows a consistent format for better organization.
2. Business and Client Information
Clearly listing both the sender’s and recipient’s contact details builds trust and ensures the invoice reaches the right person.
- Your Business Information:
- Business name
- Office address
- Email address and phone number
- Client Details:
- Client’s full name or company name
- Billing address
- Contact person’s email or phone
Including accurate contact details helps prevent delays in processing or disputes later on.
3. Itemized Breakdown of Services or Products
This section gives a transparent view of what you are billing the client for. Each item should be listed separately.
- Description: Provide a clear explanation of the services performed or goods delivered during this stage of the project.
- Quantity: The number of units or the measurable amount of work completed.
- Unit Price: Cost per service, hour, or item.
- Subtotal: The total for each item before adding taxes or discounts.
Example:
- “Design work for Phase 1” – 20 hours × $50/hour = $1,000
- “Materials for foundation” – 5 units × $200 = $1,000
This breakdown ensures transparency and helps clients understand the value of your work.
4. Total Amount Due
At the bottom of the itemized invoice, summarize the financials so the client knows exactly what they need to pay.
- Applicable Taxes: Include sales tax, VAT, or any other required government tax.
- Discounts (if offered): For early payment, loyalty, or agreed concessions.
- Final Amount Payable: This is the amount the client needs to pay after applying taxes and discounts.
Formula: Subtotal + Taxes – Discounts = Total Due
Make sure this section is visually clear, often in bold or larger font, so it stands out.
5. Payment Instructions
To ensure smooth and timely payments, make it easy for your client to know how and where to pay.
- Accepted Payment Methods:
- Bank transfer
- Debit/Credit card
- Digital wallets
- PayPal or other online platforms
- Bank Account Details: If you accept direct transfers, include:
- Bank name
- Account holder name
- Account number/IBAN
- SWIFT/BIC code (for international payments)
- Additional Notes:
- Include special instructions like:
- “Please mention invoice number in payment reference”
- “Late payments may incur a 5% fee after 10 days”
- Include special instructions like:
Tip: If you use an online invoice generator, it can auto-fill these fields and minimize errors.
Additional Suggestions for a Professional Interim Invoice
To stand out and improve client trust, consider including these extras:
- Progress Summary: Add a sentence or two summarizing what stage the project is at. Example: “This invoice covers all design and structural work completed through May 2025.”
- Remaining Balance or Future Installments: If this is one of many interim invoices, state the total project cost and what remains.
- Company Logo & Branding: A branded invoice looks professional and improves recognition.
- Terms & Conditions: Link or briefly outline service agreement terms, refund policies, or penalties for delayed payment.
When Should You Use an Interim Invoice?
Interim invoices are ideal for situations where you’re working on long or complex projects and need to receive payments at different stages. Use it When:
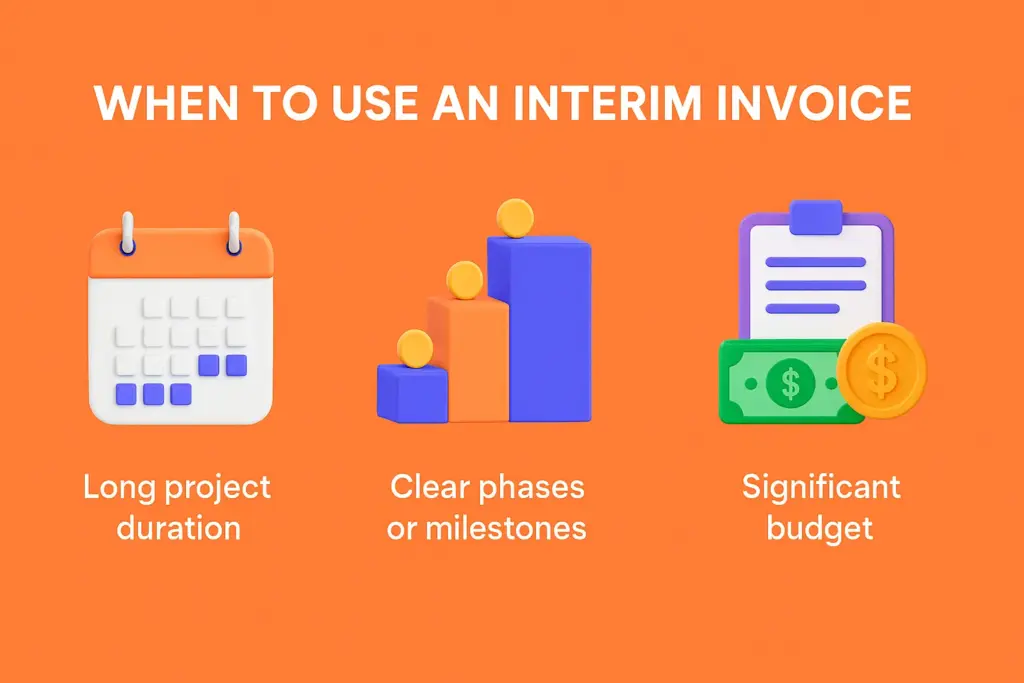
- The project spans several weeks or months: If your work is not completed in a few days and stretches across a long period, interim invoices can help you stay financially supported as you work.
- The work is divided into clear phases or milestones: Projects that move in steps such as planning, development, testing, and delivery. It can benefit from milestone-based billing. You get paid for each stage once it’s completed, which is fair for both you and the client.
- The total cost of the project is significant: When the overall budget is large, clients often prefer to pay in smaller, manageable chunks. Interim invoicing makes this possible and ensures you don’t carry all the financial burden.
Real-Life Examples of When to Use Interim Invoices
Here are some industries and scenarios where interim invoices are commonly used:
- Website or software development – Each development phase like designing, coding, or testing is a chance to issue an invoice.
- Construction projects – As different parts like foundation, structure, and finishing get completed, you can request partial payments.
- Marketing campaigns – If you’re running a campaign for several months, invoice monthly or by campaign phase.
- Legal or consulting services – Long consultations or ongoing legal cases often require billing per stage or per month.
- Creative projects – From film production to interior design, it helps cover creative efforts in stages.
Benefits of Interim Invoicing: Why It’s Smart for Businesses and Clients
Let’s break down the key benefits of interim invoicing in simple terms.
1. Improves Cash Flow Stability
As work is completed, interim invoicing enables businesses to get payments in installments. This guarantees that you won’t have to wait a long time for the project’s completion. It maintains a consistent cash flow for the duration of the project. It pays for recurring costs such as labor, supplies, and machinery. It reduces the need to finance operations with borrowed or personal funds. For businesses, it simplifies budgeting and financial planning.
2. Builds Client Trust and Transparency
Clients are able to see exactly what they are paying for by receiving bills at various stages. This helps prevent misunderstandings and boosts their confidence in your work. It establishes a direct connection between payments and finished work. It promotes openness and truthfulness in the professional relationship. It keeps disagreements over the final invoice amount at bay and gives customers a greater sense of control over their spending.
3. Speeds Up Payments
Smaller invoices are more likely to be paid on time by clients than a single, big invoice at the end. Interim billing lowers friction and streamlines the payment process. It promotes more frequent and quicker payments. It reduces the possibility of past-due or unpaid bills. Long delays that could impact your cash flow are eliminated. It lessens the need for follow-ups or reminders regarding payments.
4. Supports Better Project Tracking
In order to keep both parties informed about the project’s progress, interim invoices are usually linked to completion stages or milestones. a detailed plan outlining what has been completed and what will happen next. It is simpler to keep an eye on deadlines and make necessary adjustments. It keeps clients updated and involved at every stage, allowing for the early detection of problems like scope creep or cost overruns.
5. Lowers Financial Risk
Working without payment for months can be risky—especially if a client defaults. Interim invoicing protects your time and money. You get paid as the project moves forward, reducing exposure. It limits the chance of losing everything if a project is canceled. It helps to avoid debt caused by unpaid work and provides a payment safety net for freelancers, contractors, and agencies.
6. Ideal for Long-Term or Large Projects
Projects in industries like construction, IT, consulting, and creative services often take several months. Interim invoicing fits perfectly in these situations. It allows financial commitments to be spread over time. It keeps both sides accountable and actively engaged. It encourages feedback and collaboration at each stage and helps ensure the project stays on track from start to finish.
7. Improves Business Planning and Forecasting
Regular payments give businesses a clearer picture of future income. This makes resource allocation and growth planning more efficient. It helps in better visibility into revenue streams. It gets easier to schedule teams, supplies, and subcontractors. It reduces dependency on loans or credit to maintain operations and helps in building long-term financial stability.
Step-by-Step: How to Create an Interim Invoice
To create an interim invoice, follow these steps:
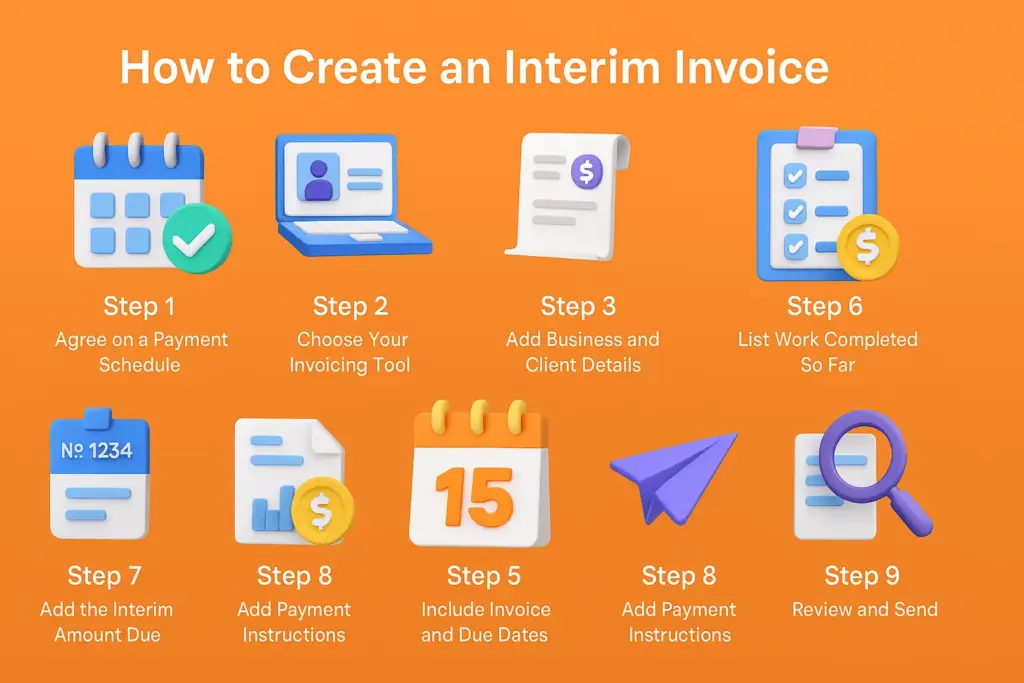
Step 1: Agree on a Payment Schedule
The total project cost, the number of payments, the amount or percentage per invoice, and the payment due dates should all be discussed and confirmed with your client prior to creating the invoice. This agreement ought to be included in the proposal or contract.
Step 2: Choose Your Invoicing Tool
You can use online invoicing software like InvoPilot or manual tools like Word, Excel, and PDF templates to create temporary invoices. For professional and recurring invoices, it is ideal.
Step 3: Add Your Business and Client Details
Add Your business name, address, email, and phone. Then Add Client’s company name and contact information and your logo. It is optional but professional.
Step 4: Assign an Invoice Number
For easy payment tracking, use a distinct invoice number. Think about including a phase or sequence, such as INV-1001-1 or INV-1001-2.
Step 5: Include the Invoice Date and Due Date
Include the date you’re sending it and the due date which is based on your agreed terms (e.g., Net 15, Net 30)
Step 6: List the Work Completed So Far
Clearly describe what portion of the work has been done, such as Hours worked, Tasks or milestones achieved and materials or resources used.
Step 7: Add the Interim Amount Due
Mention taxes or fees such as GST/VAT, the agreed-upon percentage of the total amount (for example, 25% of ₹1,00,000 = ₹25,000), and the total amount owed for this phase.
Step 8: Add Payment Instructions
Provide clear options such as Bank transfer (with account details), UPI, PayPal, or payment links and terms like “Late fee after 5 days”
Step 9: Review and Send
Double-check all the details and send the invoice By email (as PDF) or directly through invoicing software like free invoice generator.
Are Interim Invoices Legally Binding?
Interim invoices on their own are not legal contracts. They do not create binding obligations like a signed contract does. However, if they are part of a formal project agreement that clearly defines payment stages or milestones, then they can become legally binding under that agreement.
If both sides agree that interim invoices should carry legal weight, it’s important to clearly mention this in the main contract or project terms. That way, it can be used as part of a legal claim if needed.
Why Use InvoPilot for Interim Invoicing?
InvoPilot is a user-friendly tool made to assist companies in efficiently managing their billing, particularly for ongoing or long-term projects. You don’t have to be an expert in technology. With just a few clicks, anyone can easily create and send professional interim invoices. You can create unique billing schedules on a weekly, monthly, or as-needed basis. Select from clear, usable templates that give your invoices a trustworthy, businesslike appearance. Keep a clear record of every invoice, payment, and balance. By doing this, you can stay organized and receive payment more quickly and clearly.
Because it operates online, you can create and manage your invoices from any location using a desktop computer, laptop, or mobile device. To generate invoices at no cost, you can use a free invoice generator. It is designed to meet your invoicing requirements, regardless of whether you operate a service-based business, are a freelancer, or are a contractor.
Conclusion
Interim invoicing is more than just a billing method. It is a smart strategy for businesses handling complex projects. By breaking payments into manageable parts, you improve cash flow, reduce risk, and keep both clients and stakeholders informed and satisfied throughout the project.
Whether you’re in construction, IT, marketing, consulting, or creative services, using invoices ensures fair and timely compensation for your work. With tools like InvoPilot and its free invoice generator, you can easily create professional, branded invoices, set custom billing schedules, and track payments—all in one place.
Start using it today to work smarter, not harder—and get paid on time, every time.
Create Invoices Instantly – Free & Easy!
Generate professional invoices in seconds with our Free Online Invoice Generator.
👉 Try the Invoice Generator Now